Installation
Log into your Jira instance as an admin.
Click the admin dropdown and choose Add-ons.
The Find new apps or Find new add-ons screen loads.
Locate FastGantt.
Click Free trial to download and install your app.
You're all set!
Click Close in the Installed and ready to go dialog.
Configure project
Go to a project and click "Fast Gantt". If the project it not yet configured, you will get to the settings page.
Enable project
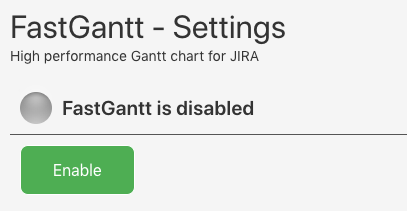
To enable the project. Press Enable
Once all sections are “green”, the configuration is done.
Project startdate
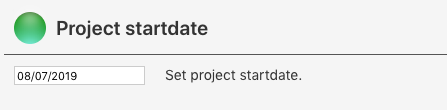
Set the startdate of the project
JIRA Features

FastGantt needs some project features enabled to work properly. IssueLinking and TimeTracking. If any of these are not green. Please update the JIRA settings
IssueLinks
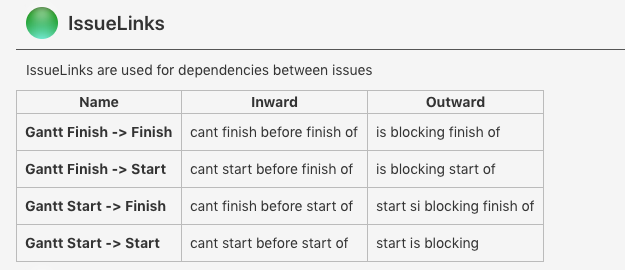
FastGantt uses special IssueLinkTypes when creating dependencies between the tasks. If this is not green, the addon had issues when creating these IssueLinks. Please create a support ticket.
Preparing DB

FastGantt need to pre process all issue data. This can take a few seconds to minutes depending on the numer of issues in the project. If you experience any inconsistencies between the data in FastGantt and JIRA. Then a refresh might help.
Default TaskType
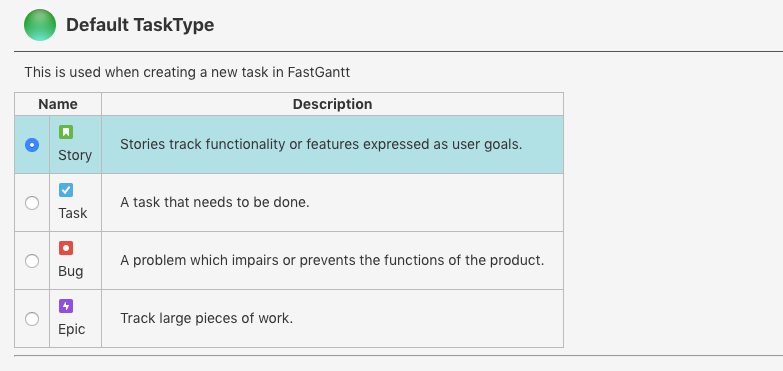
Select what issuetype that should be used when creating an issue in FastGantt
Go to gantt
When everything is green, click FastGantt in the project menu, or "Go to Gantt" at the top of the settings page. You can always go back to the settings page by pressing the settings button at the top of thr FastGantt page.